Labels

Showing posts with label my tutorials. Show all posts

Friday, November 25, 2011

Craft of the Week...Pasta Angel Ornaments

I think this tutorial is worth re-posting. Have fun making them!

These are quite possibly my favorite ornaments. My mom made them with my kids when they were little. I get the biggest kick when we open the Christmas ornament box and I see these. And the kids will always remember the fun they had with Grandma.


All you need is...
1-1/2" wooden bead for the head
1 piece farfalle pasta (bow-tie pasta for the wings)
2 pieces of elbow macaroni (arms)
1 piece mastaccioli pasta (small tube for the body)
Anchellini pasta for the hair
thin twine for hanging
white glue or hot glue
white paint

Just glue the pasta together like you see it in the picture, paint and tie a string around the wings to hang.

Tuesday, October 26, 2010

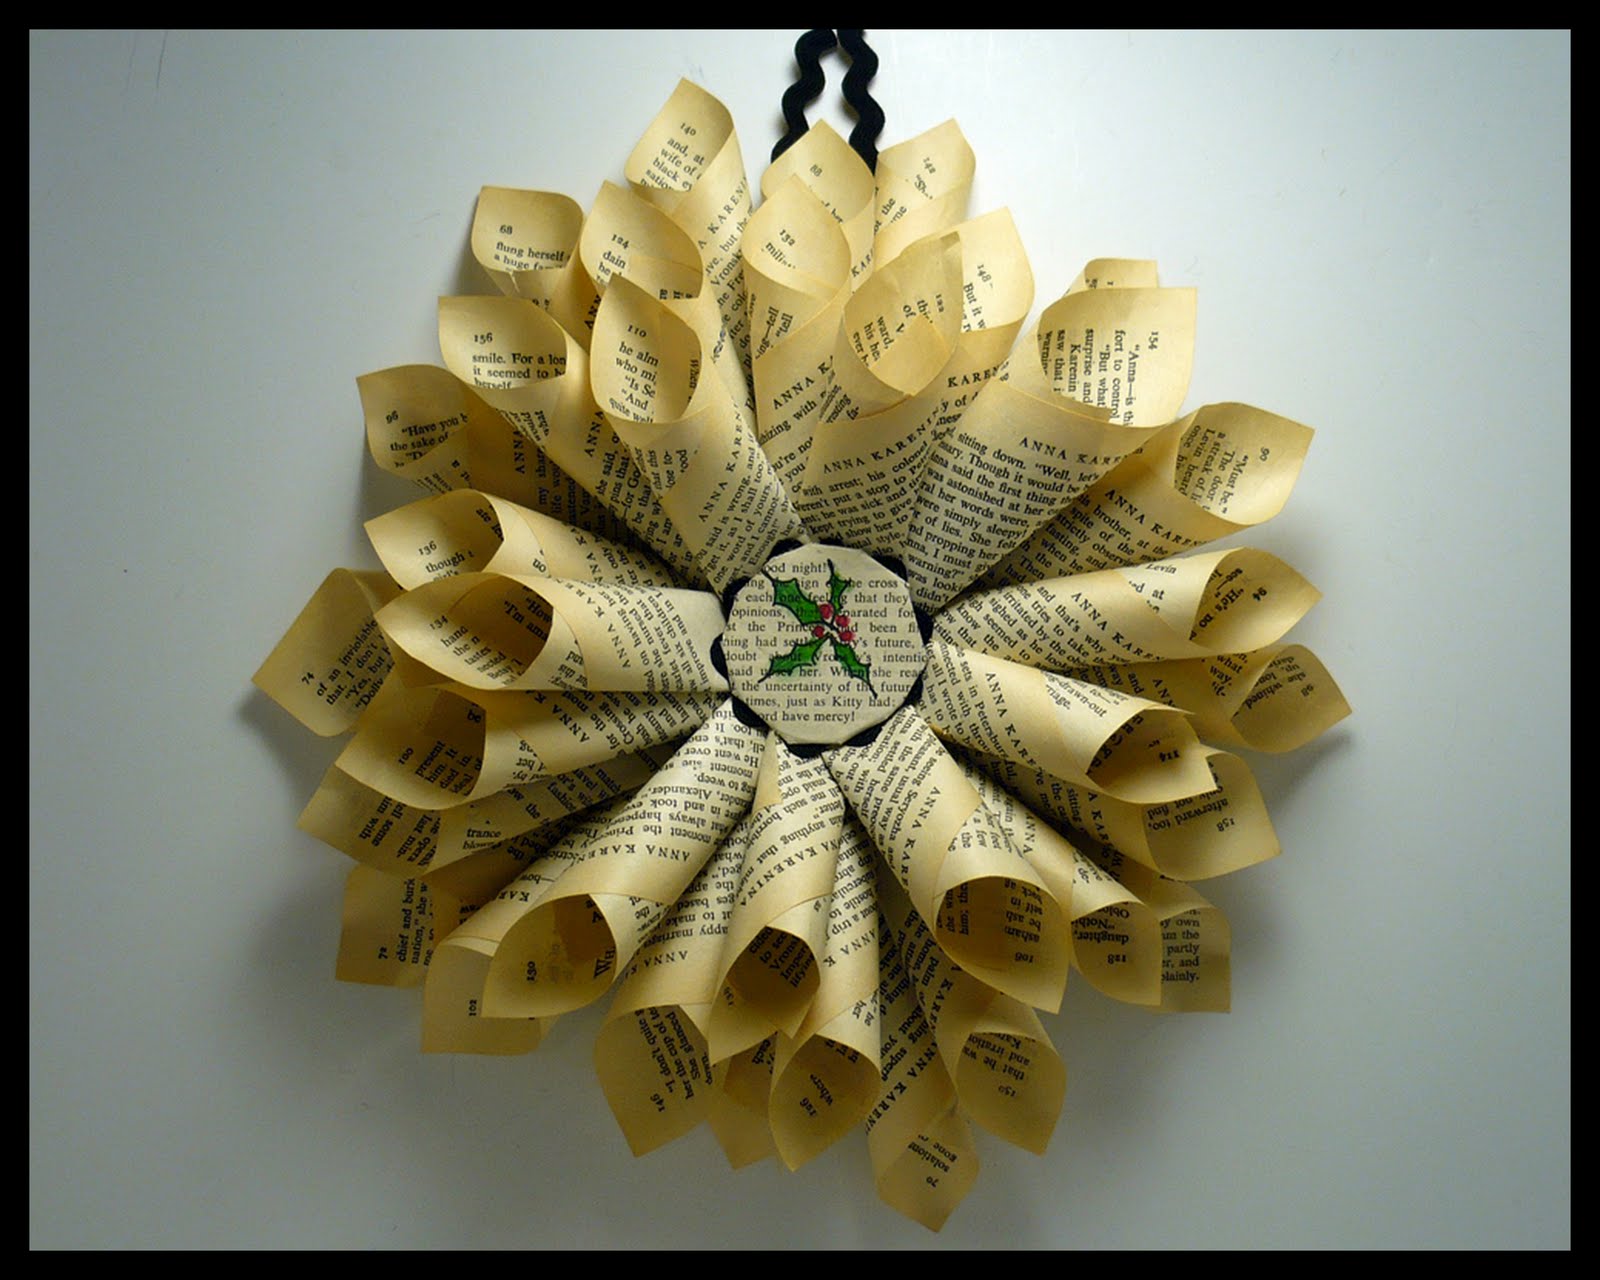
Book Page Wreath Tutorial


Who says Christmas decorations have to be expensive? I was inspired by some book page wreaths I found online while browsing my favorite blogs. Here is my take on these pretty decorations.

Materials Needed:
Glue Gun and glue sticks
Craft glue stick
Old paperback book
Rick-Rack trim
Watercolors and brush
Black thin line marker
Sturdy cardboard


1. Cut 2 circles out of cardboard-2" diameter and 3 1/2" diameter
2. Using glue stick cover each circle with a single page of text folding edges to back of cardboard
3. Tear pages carefully away from book binding and roll into a cone shape. Secure the corner with glue stick.
4. Using hot glue gun start glueing the cones to the back (unfinished) side of the larger cardboard circle with the points meeting in the center.
5. Continue glueing cones to cardboard until you have your first layer of cones.
6. Trim 1" off of the point side of your cones for the next layer.
7. Start glueing a second layer of cones to the top of the first layer placing them approximately 1" from the outside edge of the first layer.
8. Cover the smaller circle of cardboard with a page of text folding edges to the back and glueing them in place.
9. Draw a holiday motif on top of the text and color it in with your watercolors.
10. Glue a strand of rick-rack around the edge of the smaller cardboard circle.
11. Glue the small circle in the center of the wreath to cover up the points of the cones.
12. Using a 12" length of rick-rack, glue a loop to the back of the wreath for hanging.


Sunday, March 21, 2010

Moss Terrarium Tutorial


I've been busy this weekend making some moss terrariums for Easter gifts. I'm starting to get into gardening mode due to the great weather we had. These terrariums couldn't be easier to make and care for and they couldn't be prettier sitting on your desk, coffee table or kitchen window sill.


To start, you need to find a glass container with a lid. You can also use containers without lids, but you have to make sure they stay moist.


You will also need some small rocks for the bottom layer, some sphagnum moss for the second layer, some cactus potting mix for the third layer and some bonsai soil for the fourth layer. You don't have to have the bonsai soil, but I find that the different colors of the layers add interest to the terrarium. You could substitute sand for the third layer and use the cactus potting mix or bonsai soil for the fourth layer. It is not recommended that you use regular potting mix as it tends to hold too much water.


Be sure to wash your rocks. Place a small layer of rock in the bottom of a clean dry glass container.


Next, put your sphagnum moss into a bowl and dampen it with water. Squeeze out the excess water and place a layer over the rocks. I use about a 1/2" thick layer. This will help to keep the soil from sifting down onto your rocks.


The third layer is your cactus potting mix. You will want to use about a 1/2" to 1" layer.


The fourth layer is the bonsai soil. This is a pretty terra cotta and sand colored mix.


The search for the moss is the most fun part of this project. Especially if you like to walk through the woods as I do. I found my moss in my back yard on the edge of our woods. You will want to have a container and a spatula or large flat spoon with you. Most moss will lift very easily from it's location. You don't want much soil to come up with it, so just put the spoon at the edge and slide it under the moss. It will be the final layer to your terrarium.


Lay your moss out on a newspaper and take the lid of your container to determine the size you will need. Trim the moss to fit the container and place it on top of the bonsai soil.


Now you will want to water it lightly. Don't allow too much water to sit on the bottom. If condensation collects on the inside of your terrarium, you can just remove the lid for 15 minutes or so. You know it's time to water your terrarium when you no longer see condensation on the inside.

You can add a little rock or ornament to the moss for decoration. There are several Etsy shops that sell terrarium treasures, or you can make your own out of polymer clay. Just use the word terrarium in your search. Most popular items are mushrooms, gnomes and little houses.

Aren't these lovely?

Sunday, November 15, 2009

Craft of the Week...Christy's Italian Bean and Sausage Soup


Okay, I know cooking isn't the kind of craft you are expecting in this feature, but it is really a craft of sorts. Anyway, my sister gave me this recipe and I just love it. It's perfect for a cool autumn day like today. And, it's so easy.

Ingredients:
1 lb of mild sausage
1 small onion diced
1/2 cup celery diced
1 carrot diced
1 46 oz can of beef stock
1 28 oz can of diced tomato
1 15 oz can of lima beans
1 15 oz can of kidney beans
1 15 oz can of butter beans
1 tbsp Italian spice


Brown the sausage with the diced onion and Italian seasoning. Then put the meat mixture in a large stock pot. To get all the bits of sausage from your skillet, de-glaze using some of the beef stock. Pour that into the stock pot with the meat. Add the rest of the beef stock, the tomatoes, carrot, celery and kidney beans (drained). Simmer on low heat for 1 hr. Add the lima and butter beans (drained) about 1/2 hour before serving. They are delicate and will cook down to nothing if added too early. Salt and pepper to taste.
Serve with grated parmesan cheese and a crusty Italian bread. So yummy!

Sunday, November 8, 2009

Craft of the Week...Granny Square Ornaments


We have a holiday tradition in our family of giving Christmas ornaments at Thanksgiving. After turkey and pumpkin pie, we sit around the table and open packages. There are 19 in my family, which includes Mom and Dad, two brothers and one sister and their spouses, and 9 grandchildren. I prefer to make my ornaments because, as you can imagine, it gets costly to buy 19 ornaments. And, it's so much more personal to make them. I try to find something that isn't extremely time intensive...mostly because I usually procrastinate and have very little time to make anything. I also try to make an ornament that isn't too big because after years and years of exchanging ornaments, we either need 2 trees or very small ornaments.

This year I took my idea from a fellow Etsian, namolio, whose work I have lately admired. Her work is much more detailed and beautiful than mine, but I thought I'd give it a whirl. First, I went to YouTube to look for a tutorial for granny squares and was amazed at how many videos there are out there. This tutorial in particular was very easy to follow.

I used lace making cotton and a #4 crochet hook to make these 2" x 2" granny squares.


Than I made little 2" x 2" pillows using red and natural colored linen.


I attached the granny squares to the pillows with the red side up.


Now, all I have to do is attach a ribbon to hang them. Cute, huh?

Sunday, October 11, 2009

Craft of the Week...Fabric Embellishment

Here is an embellishment you can make with all those scraps you have accumulated. You will need a circle of thick felt, 4-5 circles of scrap fabric, a button, matching floss and your machine. Cut the felt into a 1 1/2" diameter circle. Cut the fabrics into circles starting with a 3", 2 3/4", 2 1/2", 2 1/4" and finally 2". You can pink some of the circles edges for extra interest. Layer the circles on top of the felt. Using your machine, sew them together. Then you can embellish the top with a coordinating button. It's that easy and you can use these instead of bows on gift packages, to fancy up a greeting card, as brooches, on purses or belts, wherever you need a little bit more decoration.


Sunday, October 4, 2009

Craft of the Week...Coloring Book Pages

This week's craft is for all the little ones in your life. I found the greatest website where you can search different categories for coloring book pages. You can select all the pages you'd like, print them and put them into a book. You just need a computer, white paper, 2 pieces of construction paper, a stapler and a printer. Print as many as you like and put them between the construction paper pages and staple. Decorate your cover however you like. Add a package of crayons and you have a super cute gift. I'm sure all you super crafty people out there can come up with even more elaborate covers and ways to bind the pages. Have fun with this one.

Here is a sample of the pages you can get.


How cute is that!?!

Sunday, September 27, 2009

Craft of the Week...Smudge Note Cards

I have to give credit to my daughter for this idea. She took plain stationery and made them into sweet little note cards. All you need is blank note cards, a Sharpie fine point pen, q-tips and the sponge type stamp pads in different colors.
Just draw a cute little picture with the fine line pen. Then, using the q-tips, dab the stamp pad to coat the tips and then smudge the color over the drawing. Yep, it's that easy.


ShareThis

LinkWithin

Related Posts with Thumbnails